dhcp win
Before running the DHCP server, you must first make sure you have properly plugged your computer into the network switch. If you have, you should see "unidentified network" listed as the connected network.
Once you are on the network, you must assign yourself a static IP address by doing the following:
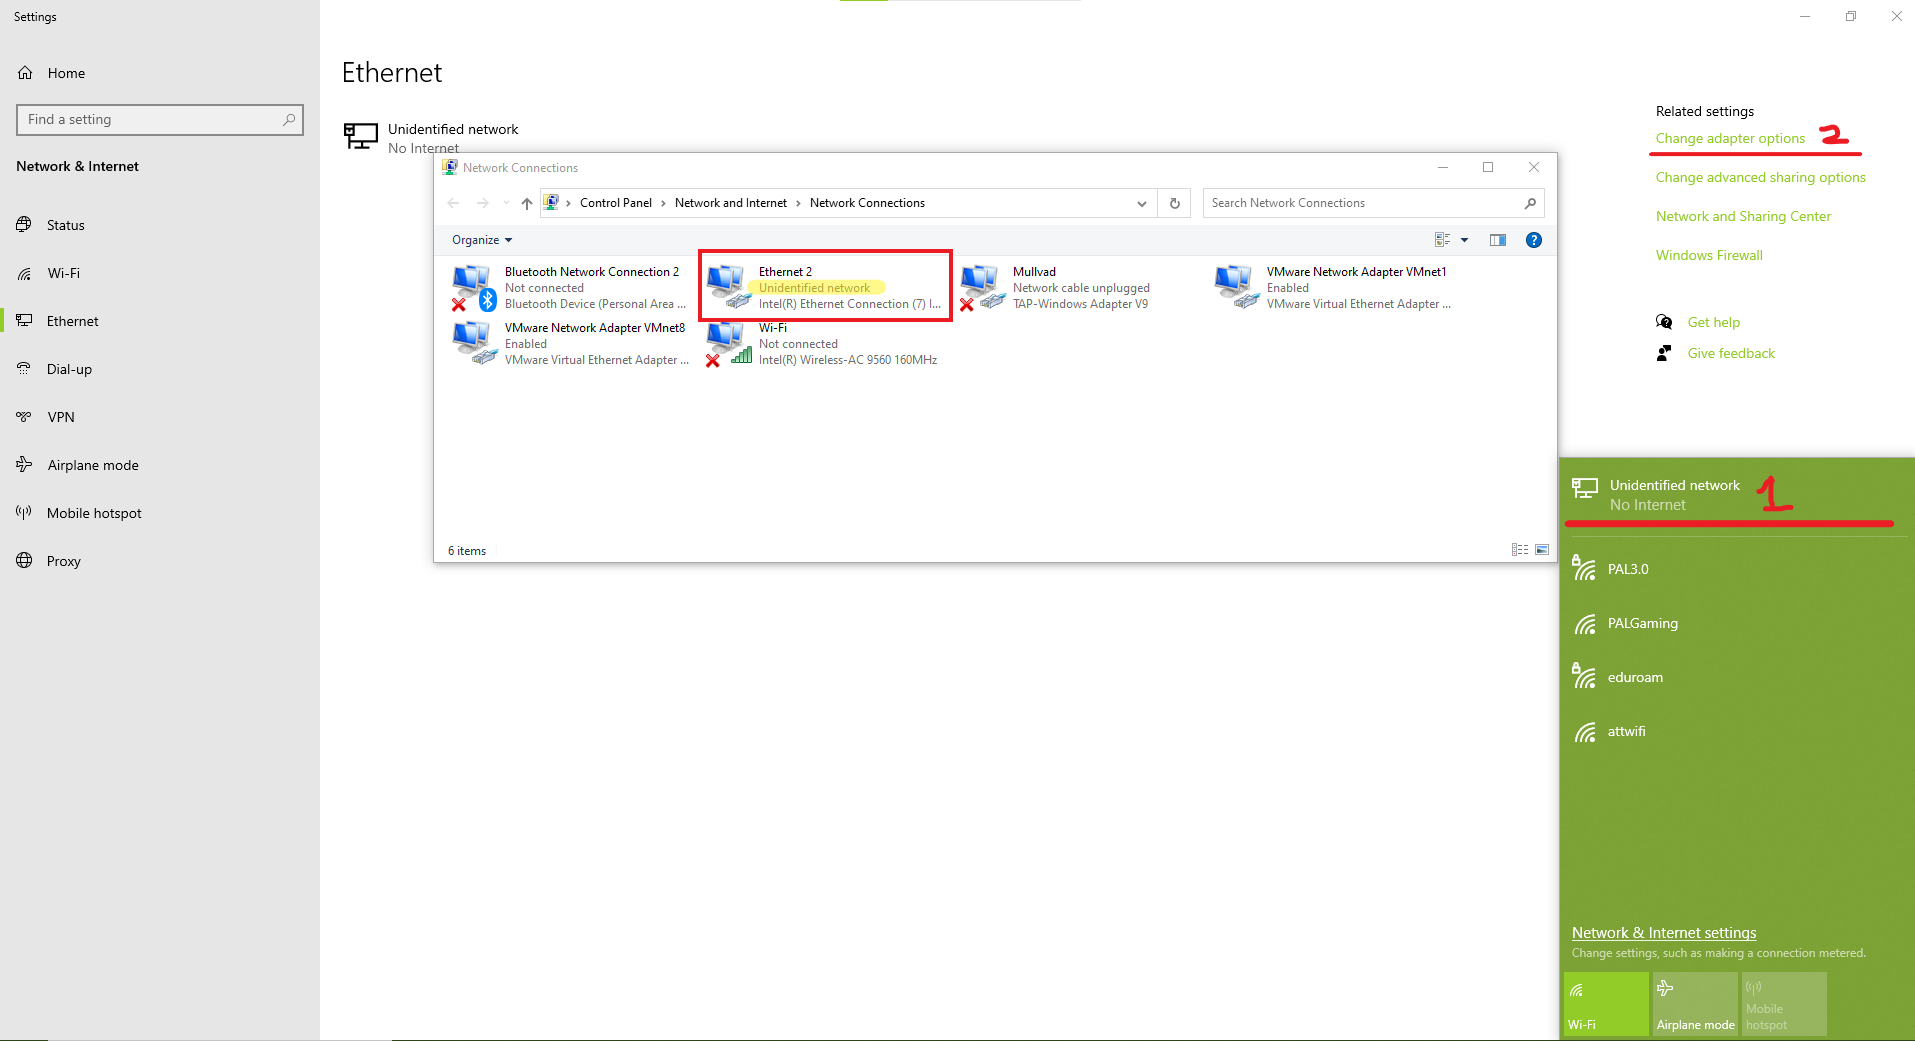
- Open up your wifi bar (icon on the bottom right, to the left of date/time) and click on Unidentified network.
- In the settings window that opened up, click Change adapter options.
- In the list of network adapters, look for the ethernet adapter that is in use and says Unidentified network in gray.
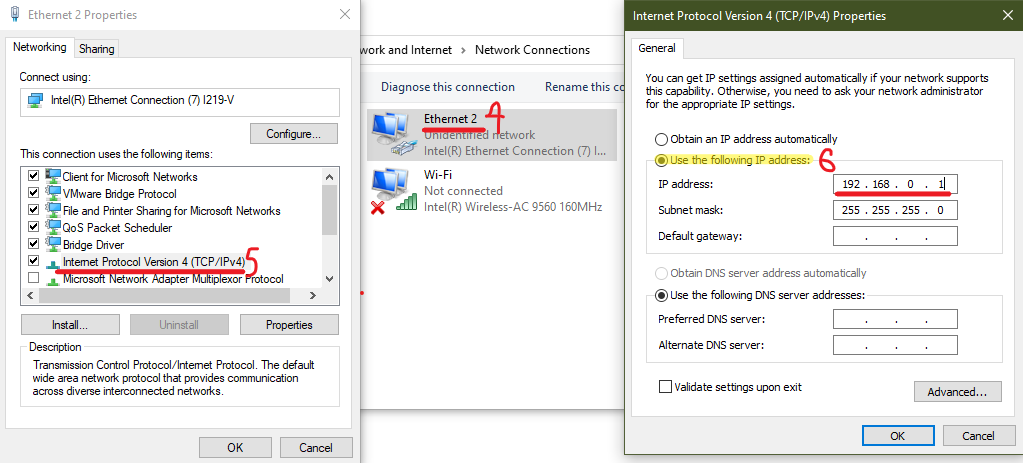
- Right click the adapter and select Properties
- In the properties window that poped up, double click Internet Protocol Version 4
- In the IPv4 window that poped up, select Use the following IP address and enter 192.168.0.1 as the IP.
- When done, click Ok on each window.
Note: The following changes will prevent you from connecting to another network via ethernet until they are reverted. You should always change it back to Obtain an IP address automatically once finished.
To configure the DHCP server, navigate to: C:\Users\{Username}\AppData\Local\Programs\scouter\resources\dhcp. In this folder there will be to similarly named files: dhcpsrv.exe and dhcpwiz.exe. Open dhcpwiz.exe.

- The first screen will ask you to select the network adapter to run the server on. Assuming you have already correctly set the static address, select the adapter that shows 192.168.0.1.
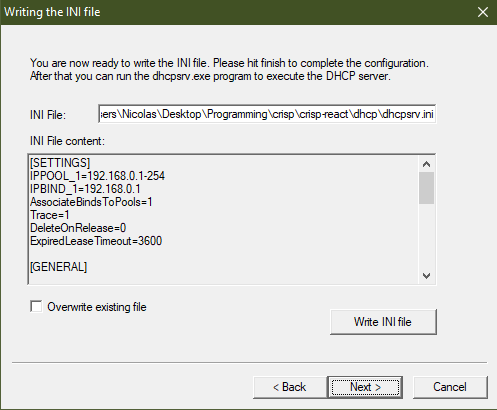
- The following screens can be left as their defaults until you get to one labeled Writing the INI file. For this screen, select Write INI file and then click next.
- On the final screen, there will be numerous buttons. For now, this can be closed.
Note: This process only needs to be performed once as long as the network adapter and static ip are the same.
To run the DHCP server, navigate to: C:\Users\{Username}\AppData\Local\Programs\scouter\resources\dhcp. In this folder there will be to similarly named files: dhcpsrv.exe and dhcpwiz.exe. Open dhcpsrv.exe.
The first time you run the DHCP server, the Windows service needed will not have been created (this will be indicated by status showing Not installed). To fix this, click the Admin... button and select Install on the left-hand column.
If the service is properlly installed, the status will show Stopped. To start the server, click Start. Any computer that now connects to the switch should have their IP address automatically assigned.
You can then minimize this window until you are done using Scouter.