
Have a look at the demo video to get an idea of what this video wall package is capable of:
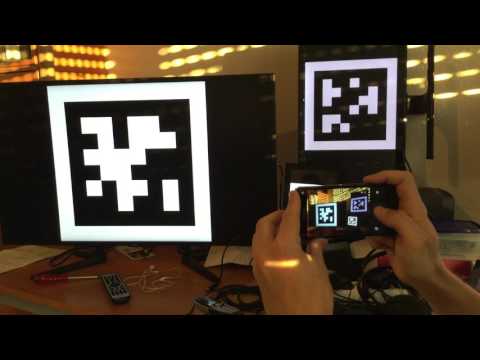
After you imported this package into your account you'll first have to create a setup based on it. A setup allows you to create a video wall from a collection of screens. If you want to create multiple video walls, just create multiple setup. In the setup you'll first have to click on the Assigned devices tab and add all the screens you want to use. Then click back to the Configuration tab. You should see the screens you've just assigned. The first thing you'll have to do now is click on the Save button. This will instruct all assigned devices to show a configuration tag. Each screen should now show something like this:

The next step is to take a picture of all your screens from the position of your future viewers. For example stand directly in front of all your screens and take a picture. Make sure all tags are visible. Finally, click on Upload/Capture Mapping Picture and select the picture you just created. On certain browsers you can even create the picture by clicking this button. After you've selected a picture it might take a moment to automatically detect all the tags in the picture. If everything was successful, all screens items in the configuration interface should turn green. Just click on Save again and you're ready to show content on your video wall.
If you're not satisfied with your configuration, just click on Map again. This will remove the previous mapping configuration and allows you to create a new one. Make sure you click on Save so all screens show the configuration tags again.
You can have screens in any orientation. They can be rotated in almost any direction as long as the tag is still detectable by the configuration system. Be aware that a wierd arrangement might only look good from the position you took the mapping picture.
If you want to create a video wall that works from any angle, be sure that all screen surfaces are planar.
Make sure you get as close to your screens as possible as the video/image you show on your screens will be scaled according to the mapping picture you took. The further you're away from the screen, the less of the content you'll see on them later.
I'd suggest you just play around with them a bit to get a feeling of how the mapping system works.
Click on the node labeled Playlist Configuration on the left side of the configuration screen.
You can add images and video assets to your playlist. If you make changes to a playlist and click on Save, your devices will go black for a short moment until they are all back in sync. Therefore it is recommended to make all changes to a playlist and save only once.
This is the first public release. While it works, there might be problems. If you find anything, please open an issue on github.